

Set up Tasks
AWS Resources
- Create IAM role to pull images from private clickhouse ECR
- Create ECR repositories to host copies of our artifacts in your own ECR, this guide assumes you will use the names below as your ECR repo names. Please use the specified tag of each artifact.
- Copy ECR artifacts from our ECR to your ECR repository
- Create VPC
- Create EKS cluster
- Requires the following components:
- CNI of your choosing (must use ipv4), eg Amazon VPC CNI
- If using Amazon VPC CNI we recommend using IRSA, you can follow this guide using the ipv4 instructions: https://docs.aws.amazon.com/eks/latest/userguide/cni-iam-role.html
- EBS CSI Driver, eg aws-ebs-csi-driver
- DNS, eg CoreDNS
- Recommended: Autoscaling, may require components such as cluster autoscaler
- CNI of your choosing (must use ipv4), eg Amazon VPC CNI
- Associate with previously created VPC
- Node groups
- All nodes require IMDS for authentication
- For keeper and server node groups, create one node group per AZ if you wish to support cluster autoscaler across AZs as recommended here, otherwise they can be created as single node groups with the appropriate AZ subnets
- Keeper node group
- AMI image:
- x86: AL2023_x86_64
- arm64: AL2023_ARM_64
- Disk size: 20gb
- If not using autoscaling, min and desired nodes should be 3 per ClickHouse cluster
- Recommended instance type:
m7g.2xlarge - Kubernetes labels
- x86:
clickhouseGroup: keeper - arm64:
clickhouseGroup: keeper-arm64
- x86:
- Kubernetes taints
clickhouse.com/do-not-schedule: true, NoSchedule- arm64:
clickhouse.com/arch: arm64, NoSchedule
- Tags
- May be required by cluster-autoscaler, if being used
- Example:
k8s.io/cluster-autoscaler/enabled: truek8s.io/cluster-autoscaler/$CLUSTER_NAME: owned
- Example:
- May be required by cluster-autoscaler, if being used
- AMI image:
- Server node group
- AMI image
- x86: AL2023_x86_64
- arm64: AL2023_ARM_64
- Disk size: 20gb
- EC2 Launch Template for Node Group)
- If not using autoscaling, min and desired nodes should be equal to the desired number of ClickHouse replicas
- Recommended instance type:
m7gd.16xlarge- Strongly recommended to use a “d” series instance (eg
m7gd.*) which includes NVME SSD that will be used by ClickHouse as a cache- For instances with NVME SSD, use a custom launch template to automatically mount the NVME SSD
- Strongly recommended to use a “d” series instance (eg
- Kubernetes labels
- x86:
clickhouseGroup: server - arm64:
clickhouseGroup: server-arm64
- x86:
- Kubernetes taints
clickhouse.com/do-not-schedule: true, NoSchedule- arm64:
clickhouse.com/arch: arm64, NoSchedule
- Tags
- May be required by cluster-autoscaler, if being used
- Example:
k8s.io/cluster-autoscaler/enabled: truek8s.io/cluster-autoscaler/$CLUSTER_NAME: owned
- Example:
- May be required by cluster-autoscaler, if being used
- AMI image
- x86 node group to run x86 other processes (operator, …)
- Can be an existing node group if the EKS cluster already exists as long as it is x86 compatible with a minimum size of xlarge nodes
- For new node group
- AMI image: AL2023_x86_64
- Disk size: 20gb
- Instance size: minimum xlarge
- Instance type: any x86 compatible type
- Requires the following components:
- Create OIDC provider for EKS cluster
- Create S3 bucket (S3 standard class) with encryption enabled
- Bucket should be in same region as EKS cluster
- You can create a bucket per provisioned clickhouse cluster, or use a single bucket but requires a unique prefix per ClickHouse cluster (defined in clickhouse CR/helm chart)
- Create NLB, required if ingress outside of the Kubernetes cluster is needed
- If an NLB is needed**, it should be provisioned per clickhouse cluster**, unless something like istio will route the requests to the correct cluster
- Create route 53 entries, can be done in an automated fashion with something like external-dns (setup instructions not included in this doc) using Kubernetes annotations
- Create IAM roles:
- The role(s) below should be using a trust policy similar to this (ie they should use IRSA) unless otherwise specified
- clickhouse-server/keeper role
- This role is needed per provisioned ClickHouse cluster
- Naming convention should be
CH-S3-$NAME-$REGION-$ORDINAL-Role$NAME, cluster name, egdefault-xx-01$REGION, identifies the region of the cluster to avoid naming conflicts across regions if the same cluster name is used.- The full region name isn’t needed and could result in a role name that is past the allowed limits. Feel free to use a shortened name such as
uw2forus-west-2
- The full region name isn’t needed and could result in a role name that is past the allowed limits. Feel free to use a shortened name such as
$ORDINAL, reserved, set to00- Example role name for service named
default-xx-01in us-west-2:CH-S3-default-xx-01-uw2-00-Role
- Bucket permissions
- Minimal permissions are:
s3:*,s3:ListBucketon bucket resource
- Minimal permissions are:
Kubernetes Resources
- Install VolumeSnapshot CRDs
- Install StorageClass via Helm Chart if you do not wish to use a custom or existing StorageClass
- Install operator via Helm chart
- Create clickhousecluster resource (repeat per ClickHouse cluster being provisioned)
- Accessing the Cluster and Verifying Installation
- Hydra setup (Compute compute separation)
Technical Details
Example VPC Configuration
- IPv4 CIDR block: 10.20.0.0/16
- No IPv6 CIDR block
- Tenancy: Default
- Number of AZs: 3, should be a minimum of 3 for HA between AZs
- Public Subnets:
- us-west-2a: 10.20.192.0/20
- us-west-2b: 10.20.208.0/20
- us-west-2c: 10.20.224.0/20
- Private Subnets:
- us-west-2a: 10.20.0.0/18
- us-west-2b: 10.20.64.0/18
- us-west-2c: 10.20.128.0/18
- NAT Gateways: 1 per AZ
- VPC endpoints: S3 gateway
- DNS Options:
- Enable DNS hostnames: true
- Enable DNS resolution: true
Copy ECR Artifacts
We highly recommend using skopeo for copying the images as it will retain all of the architectures in the docker images. Be sure to set theTARGET_REGION and TARGET_ECR_REPO below to your ECR region and host.
Creating EKS Cluster
Requires cluster IAM role and node IAM roles. The roles created using the “Create recommended role” button using the default permissions in the AWS console UI is sufficient. Run the following to add new EKS cluster to kubeconfig:Cloud Formation to create IAM role to pull images
Requires an IAM role to pull images from a ClickHouse private ECR. The role is created using the CloudFormation template. Once the role ARN is created, you need to provide the ARN (see output) to the ClickHouse team. CloudFormationEC2 Launch Template for Node Group Server
Before creating a server node group, it’s recommended to create an EC2 launch template to provision the node with an SSD disk for caching ClickHouse queries. The template should contain the script below. Note that there may be existing data in the launch template, if previously created, which should remain. In this case, be sure the different files are separated by the specified boundary. Advanced details (User data):Logging into ECR from Helm
This may be needed to be able to pull helm charts from ECR using the Helm CLI. Update the variables as needed.Install StorageClass via Helm
If a StorageClass is needed, it’s recommended to install these clickhouse-operator dependencies via the provided Helm chart separately from the actual clickhousecluster CR creation so that if multiple CRs are created, the dependencies are not tied to any cluster and will not be removed if that cluster is deleted. This step only needs to be done if you do not have a custom or an existing StorageClass CR that you plan on using for clickhouser-server and clickhouse-keeper.Install Operator via Helm
Update version, ECR host, and availability zones (as determined by created VPC) as needed.Install Operator via Kustomize
If you are using kustomize, you need to explicitly providenamespaceOperator with the namespace where you want to install the operator (default namespace name: clickhouse-operator-system) as part of the values due to a known issue: https://github.com/kubernetes-sigs/kustomize/issues/5566.
Install aws-ebs-csi-driver
Requires an IAM role with the following:- Use managed policy
arn:aws:iam::aws:policy/service-role/AmazonEBSCSIDriverPolicy - For trust policy, it’s recommended to use sts:AssumeRoleWithWebIdentity with EKS cluster’s OIDC provider (example)
- Selected role name must match annotation on service account that runs the aws-ebs-csi-driver
- Example name:
ClickHouse_EksEbsCsiDriverRole
- Example name:
Install VolumeSnapshot CRDs
Currently these are required by our operator, but not currently used in your setup.Example Trust Policy
Be sure to use the correct namespace, service account name, and OIDC provider. The namespace and service account name will differ depending on which role is being configured.Naming Your ClickHouse Cluster
For each ClickHouse cluster being provisioned, select a cluster name that is unique within the target EKS cluster. This name will be used in various AWS and Kubernetes resources and will be used to uniquely identify the cluster.- The naming convention should be
$DESCRIPTOR-$LETTERS-$ORDINAL- $DESCRIPTOR - some descriptive name of the cluster consisting of letters only
- $LETTERS - reserved, select any two letters, for simplicity,
xxwill work - $ORDINAL - incrementing ordinal for clusters with the same descriptor starting with
01
- Example name:
default-xx-01
Clickhousecluster CR
Note the values below should be reviewed and updated for a production environment (eg resources, feature flags, server configurations, …). See the section about naming before setting theCLUSTER_NAME.
Generate the password hash for the given $PASSWORD using the following command (os x) then pass it to the account.hashedPassword value of the Helm chart:
Hydra setup
The idea is to create multiple node groups inside one ClickHouse cluster. Every such node group will have a different number of nodes (with different amounts of memory) and a separate endpoint. Such node groups will have a single keeper instance and a single data set / folder in the shared S3 bucket.Provisioning Hydra children instances
Prerequisites
The operator should be installed with the Hydra feature enabled by setting (default false):Setup
Before creating child instances, you need to choose an existing and/or create a new parent ClickHouse cluster, so you should know in advance the parent name and namespace for the children. To create a new child service, follow the same instructions for creating a service, and simply add new Helm values when creating theClickHouseCluster custom resource (CR):
Limitations
- You can’t provision child instances if the parent instance is stopped, terminated, or idled.
- If you want to delete the parent cluster, you must delete the child instances first.
Install Validation
Preflight Checks
An optional preflight check exists using Troubleshoot, a Kubernetes plugin for cluster diagnostics. To install the required plugins you can use Krew:helm/preflight-check) that can be copied to your ECR and rendered locally to generate the preflight spec, which is then passed to kubectl preflight.
Copying the Preflight Check Helm Chart
Add the preflight chart to the ECR copy step:Running the Preflight Checks
Usehelm template to render the preflight spec, then pipe it directly to kubectl preflight. Set CLUSTER_NAME to the name of the ClickHouse cluster you want to validate (see Naming Your ClickHouse Cluster):
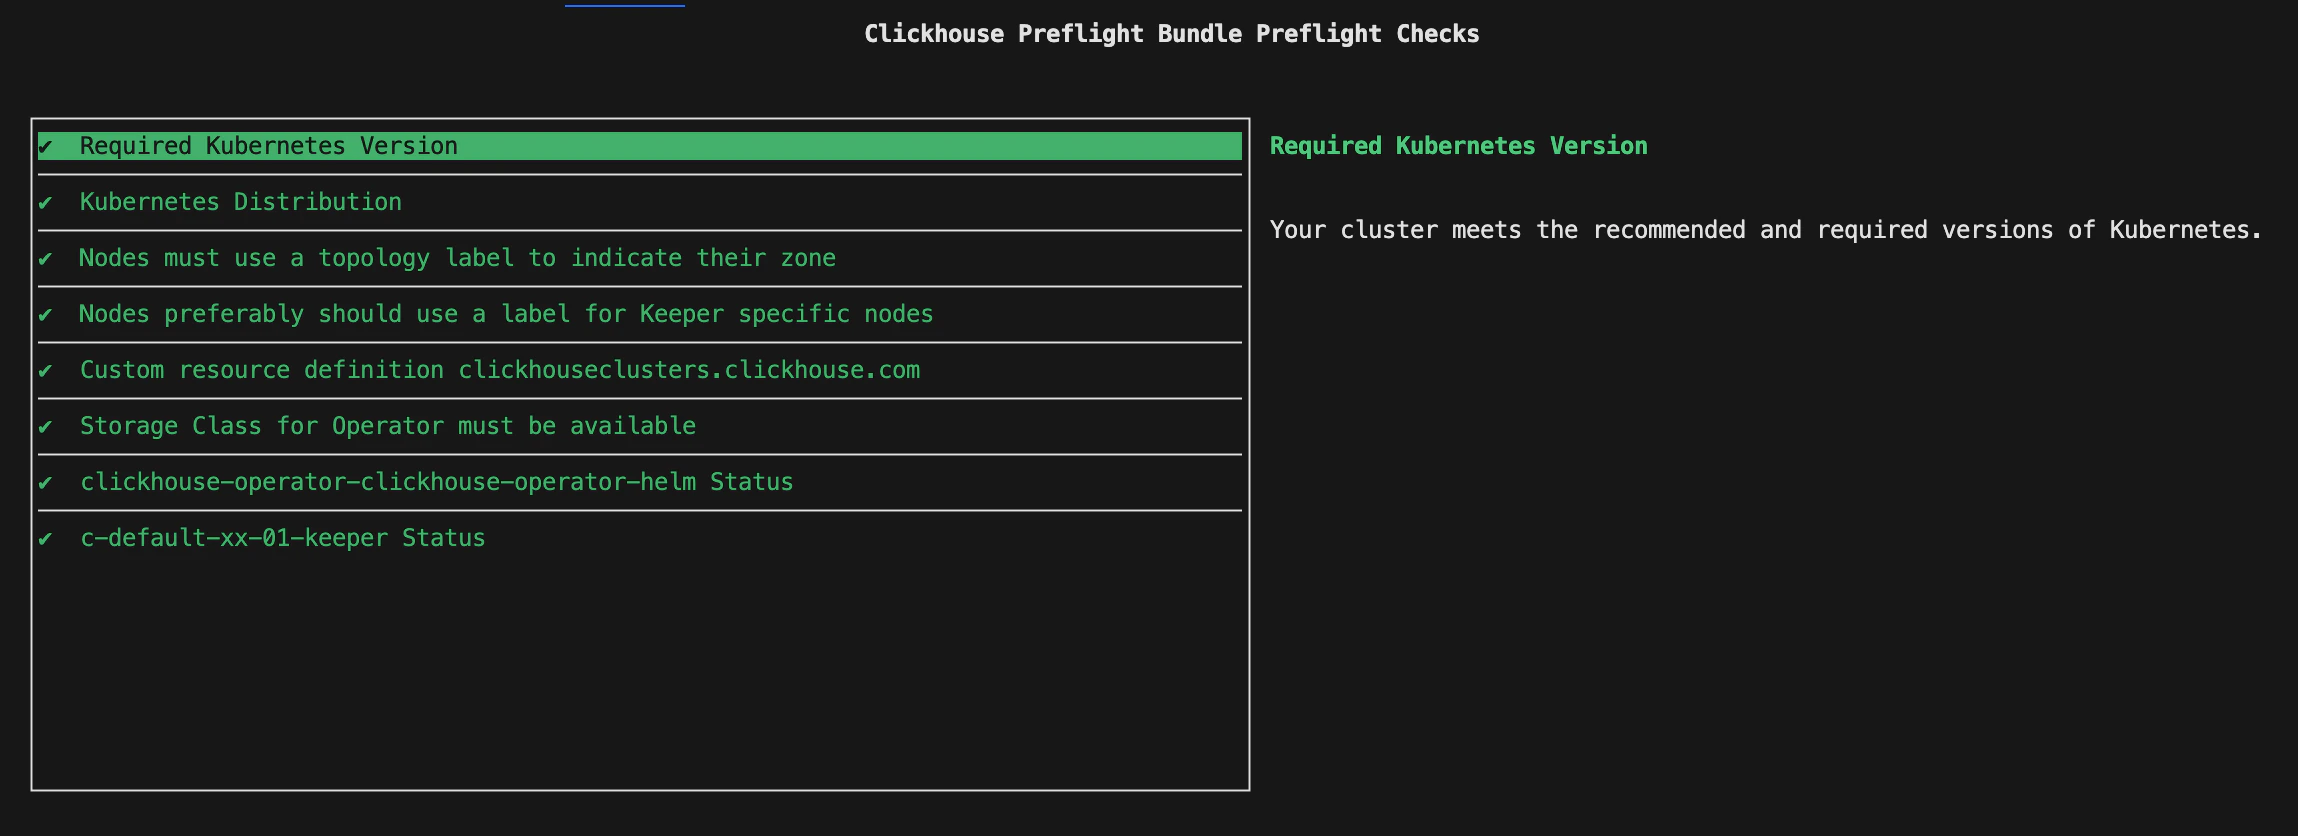
gp3-encrypted), override it with an additional --set flag:
Required Permissions
The user or service account executingkubectl preflight must be able to read cluster-level and namespace-level resources. At minimum the following access is required:
In practice, a principal with the built-in
view ClusterRole plus view access to the relevant namespaces is sufficient. A cluster-admin binding will also work and is simpler to configure for one-off validation runs.
Port-forward the ClickHouse service to your local machine
To forward traffic from your local machine to the c-default-xx-01-server-any service, run:9000 on the service to port 9000 on your local machine. You can now access the ClickHouse HTTP interface on http://localhost:9000.